This article contains sponsored content. I received compensation from CANVASDISCOUNT to create this review. All opinions, images, and conclusions are entirely my own, based on my personal experience with the products.
Introduction
My dog, Riff, is 14 years old. As a pet photographer, I’ve created and immortalized portraits for hundreds of people across Europe and the U.S., yet I’ve never really taken the time to photograph my own dog professionally.
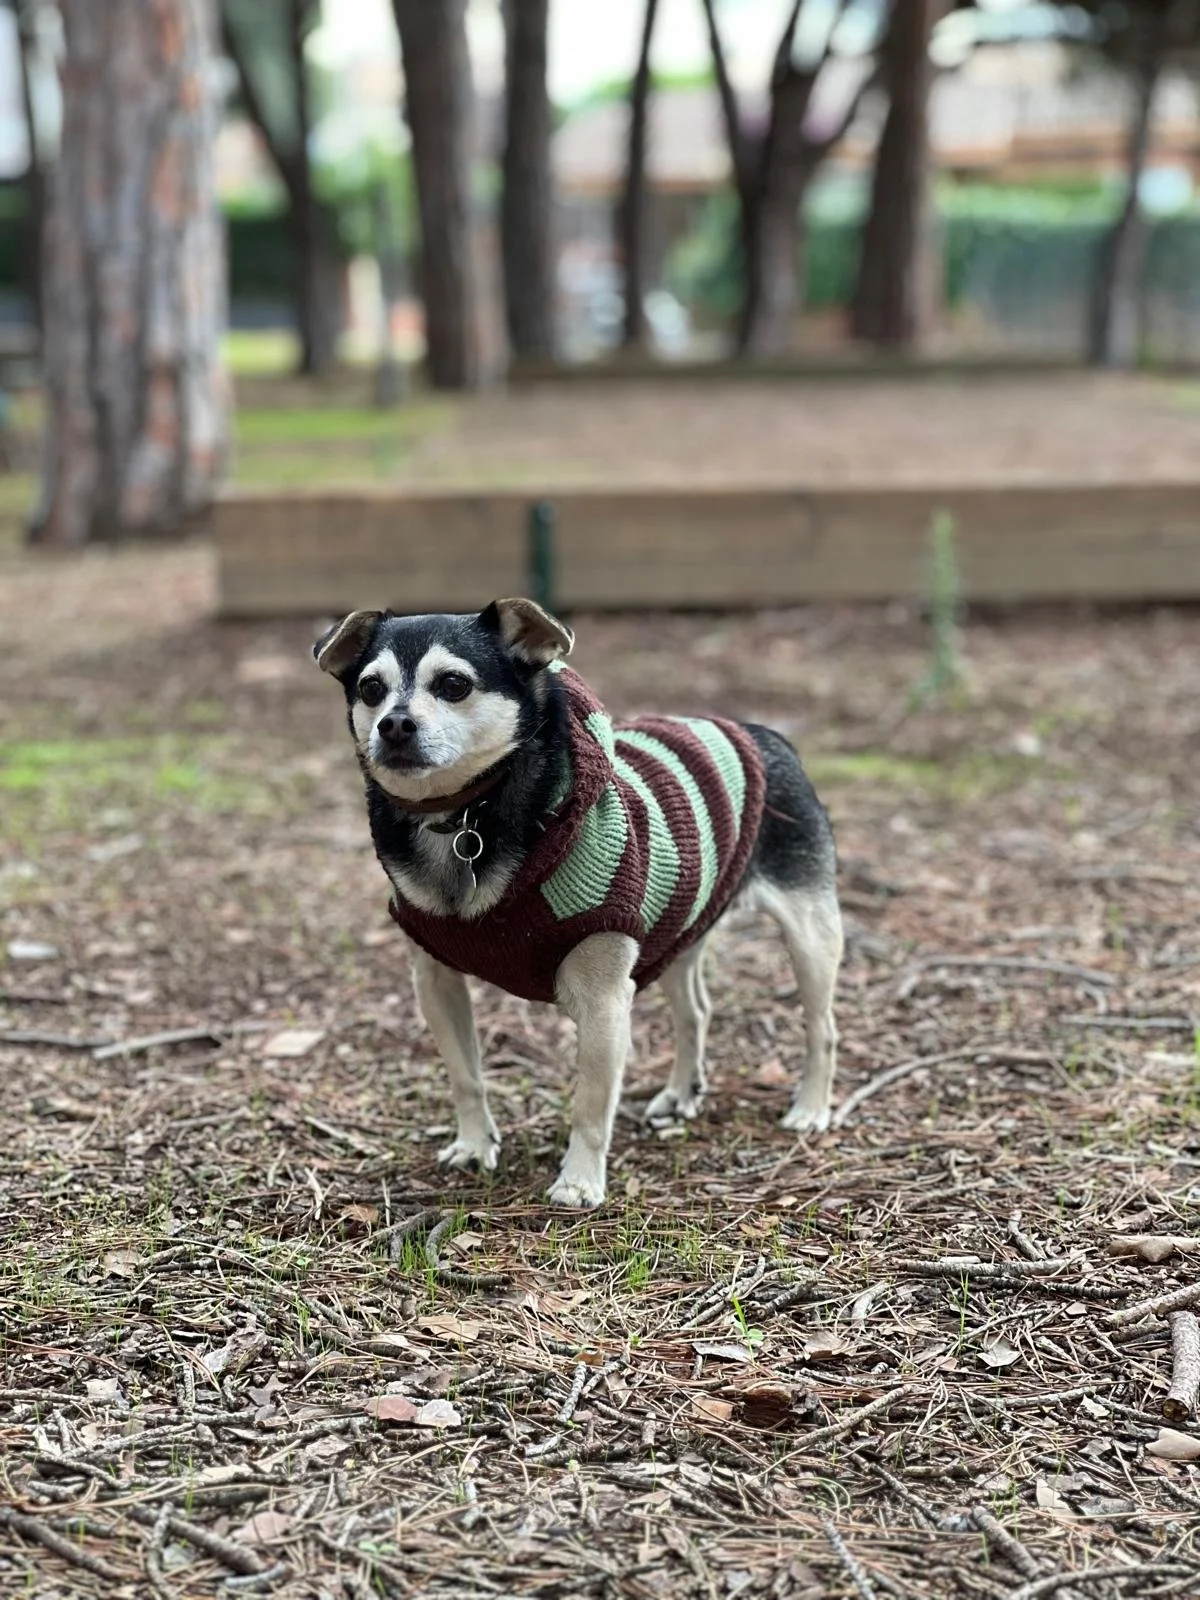
Riff at 14 — still curious, still present.
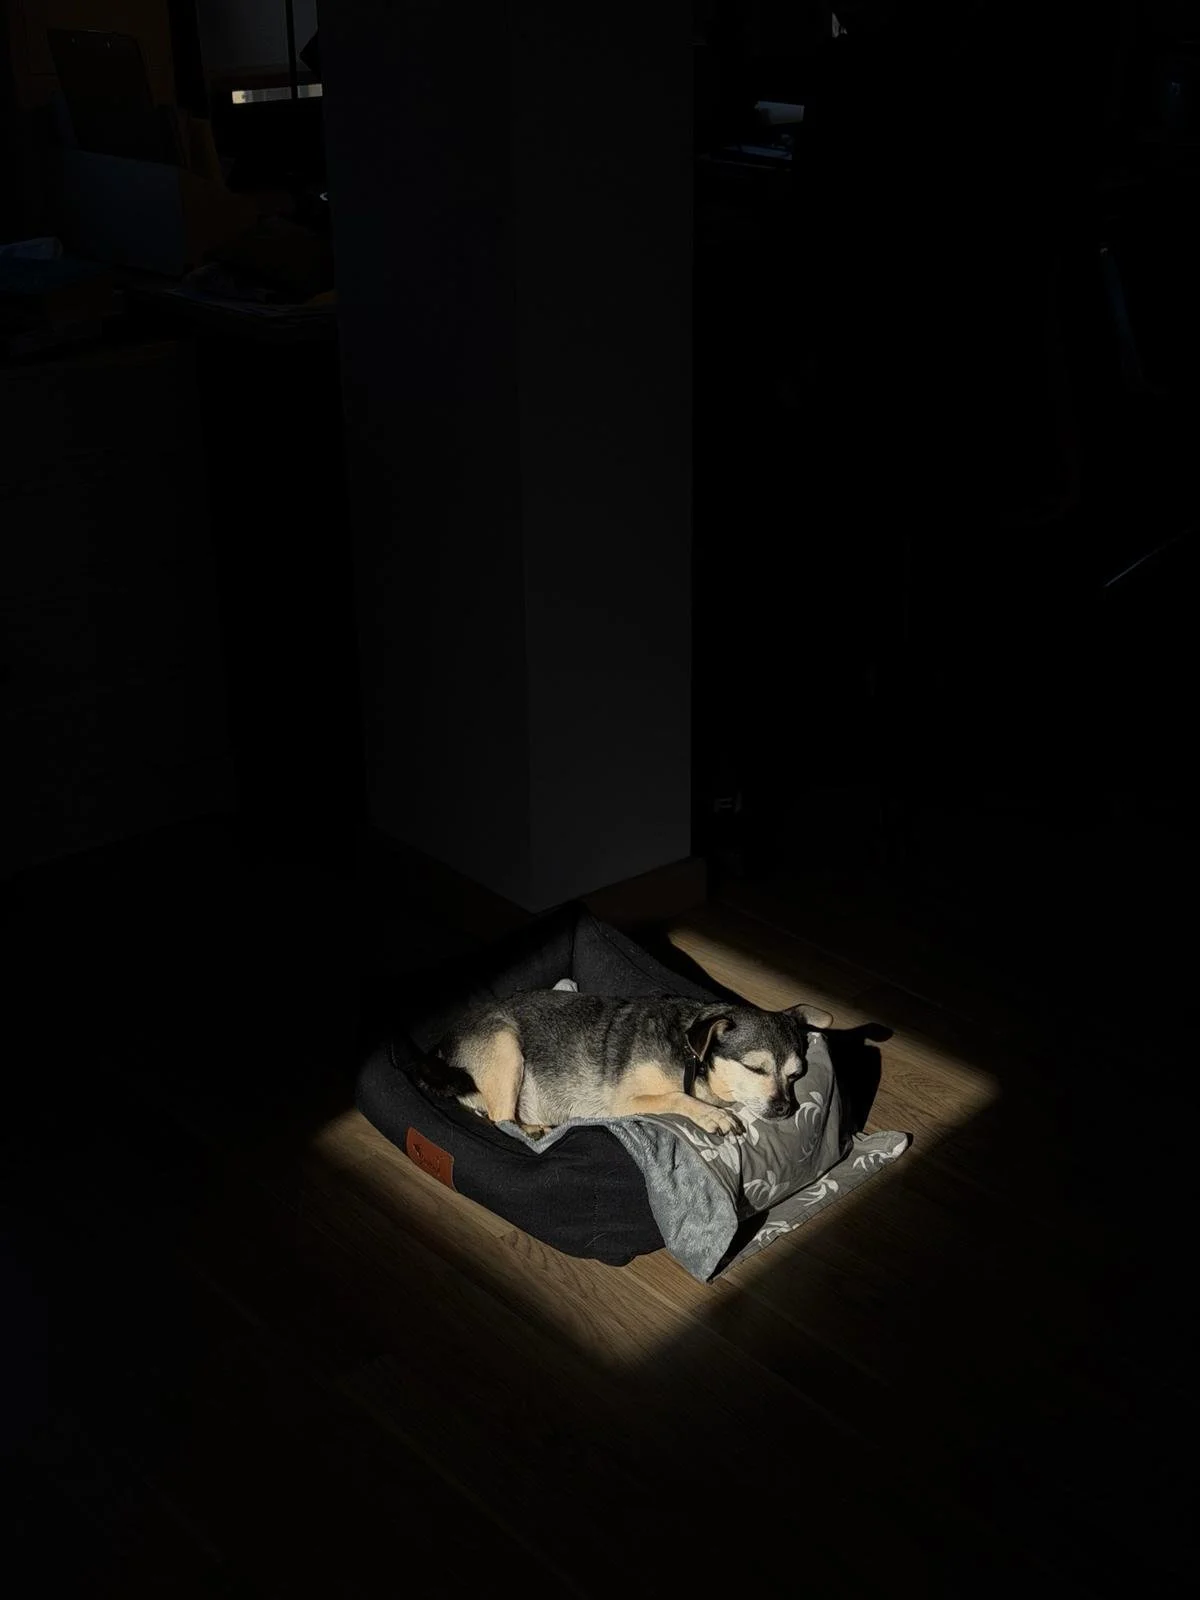
Riff, 14 years old, napping in a patch of morning sun — the kind of image that makes you want to reach for your camera.
And I think it’s time.
At 14, Riff is in that stage of life where you become more aware that time is precious. I wanted to create something that goes beyond the typical photo sitting in a digital gallery or printed in an album. I wanted something more tangible. Something with presence. Something that turns a portrait into a high-quality pet portrait print and a lasting piece of memory.
So for this project, I decided to try CANVASDISCOUNT and turn two of Riff’s portraits into two products: a canvas print for pet portraits and a custom photo blanket from a photo — including one that is, very fittingly, for him.
In this article, I’ll walk you through the full process from start to finish: how I choose the right image, how I prepare it for professional photo printing, how I decide which product suits it best, and finally, how the finished products look and feel once they arrive.
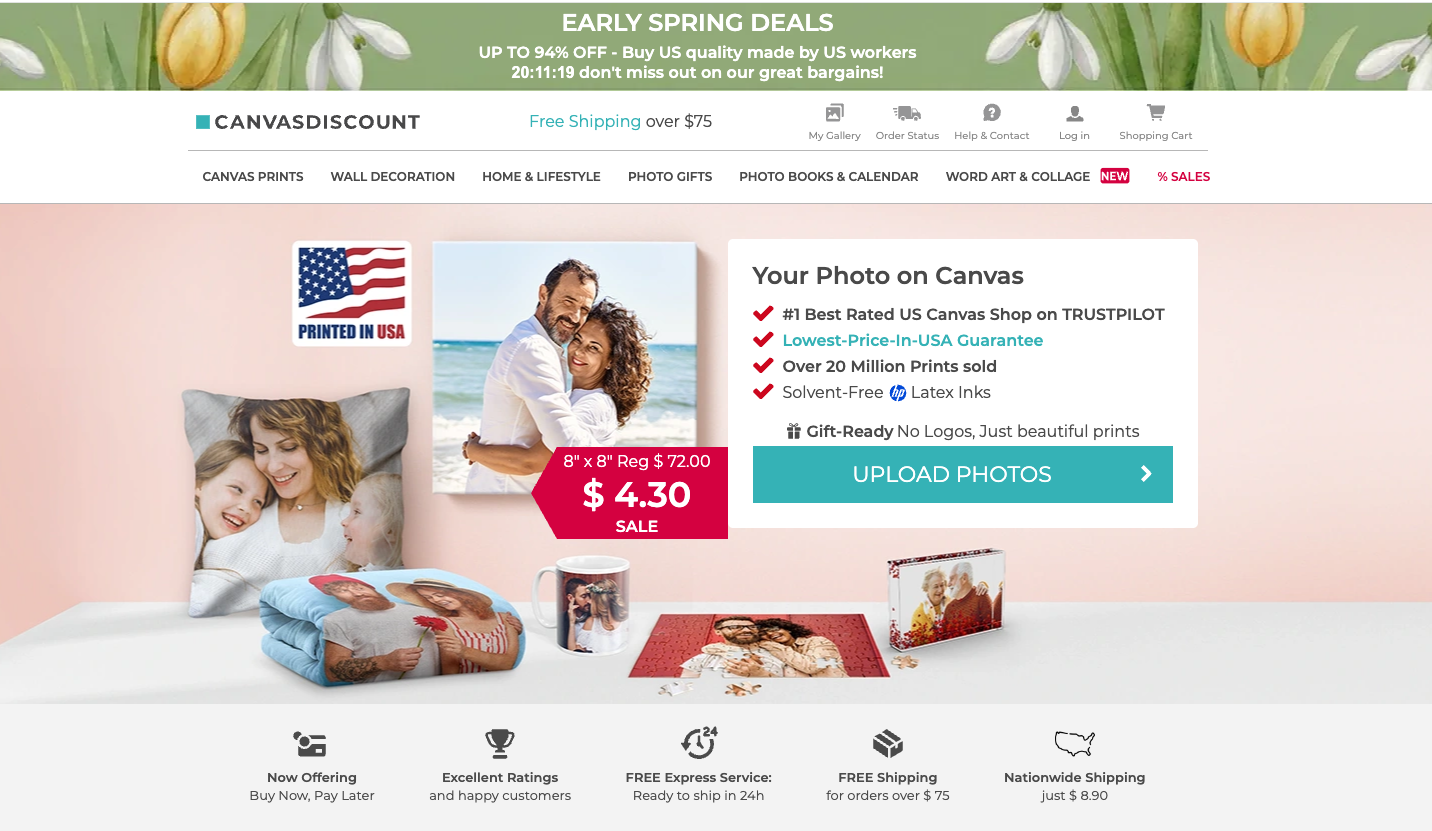
CANVASDISCOUNT’s spring deals made it the perfect moment to turn Riff's portraits into something tangible — starting from just $4.30.
Choosing the Product First
The first step is visiting CANVASDISCOUNT to explore the available products. Right away, I notice they are running several spring deals, which is perfect. After the holidays, saving a few dollars on printing always feels like a good idea.
As I browse through the options, two products immediately stand out to me.
Browsing CANVASDISCOUNT’s product range — the first step in choosing the right format for Riff's portrait.
The first one is a canvas print. That’s the classic choice when you want a portrait to live on your wall. A canvas has presence, texture, and it turns a photograph into something closer to a piece of art — especially when creating a wall art pet portrait.
The second choice is something a little more personal and playful: a photo blanket, or what many would call a custom pet blanket from a photo. I’ve actually never ordered one before, but I love the idea of creating something unusual and cozy — especially since the portrait will be of Riff. The thought of having a blanket with his portrait on it feels both fun and meaningful.
Now that I’ve decided on the products, the next step is selecting the image.
And this is where many people do things in the wrong order.
Not every photograph works well for every product. The composition, resolution, crop, and subject placement can determine whether an image translates beautifully into a canvas, or whether it might work better on something smaller like a mug, pillow, or puzzle — especially when you plan to print pet photos at a larger size.
Because I don’t have a single “favorite” image in mind yet, I prefer to reverse the process: first choose the product, and then go into my hard drive to find the photograph that will translate best into that format.
So that’s exactly what I’m going to do next — dig into my photo archive and find the portrait of Riff that will work best for both the canvas and the blanket.
Choosing the Right Photo for the Print
Once I open my Lightroom catalog, the first thing I do is start flagging the images that I like. At this stage, I’m not making a final decision yet. I’m simply narrowing the options down to photographs that could potentially work well as a printed product.

The selection process starts in Lightroom — flagging, comparing, and star-rating portraits to find the image with the sharpest eyes, strongest composition, and best print potential.
However, there are a few criteria that the ideal photo needs to meet — especially if you want to create a high-quality pet portrait print.
The first one is simple: I want Riff to be alone in the photograph.
I have many beautiful images where my husband and I appear with him, but for this project I want him to be the main character. Riff is a small dog, and when the goal is to turn a portrait into a physical product, I want all the attention to go directly to him without any distractions.
Once that’s clear, I start looking at the composition of the image.
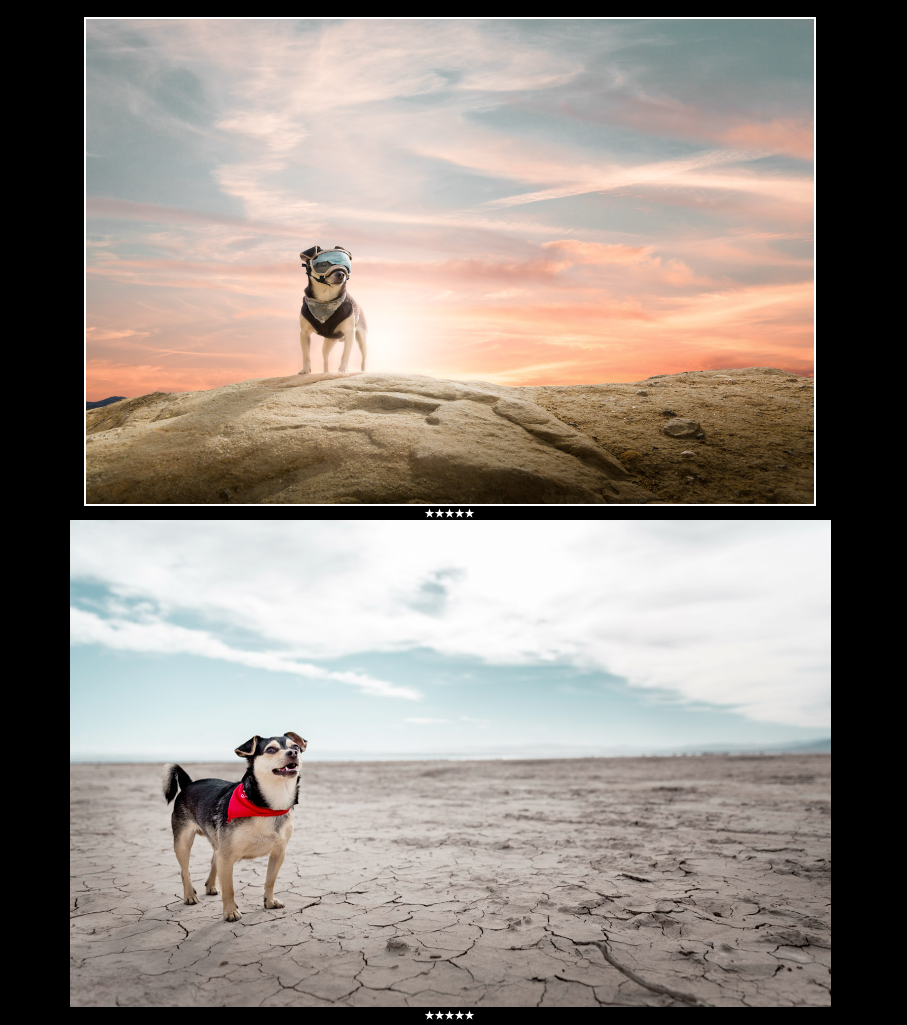
Two of Riff's portraits considered for print — each with strong composition, presence, and a distinct mood that translates beautifully onto canvas.
For a product like a canvas or a blanket, the composition needs to feel engaging and balanced. I want the photograph to have a sense of presence, where the environment enhances the portrait rather than competing with it. Ideally, the surroundings should elevate the subject and help highlight my dog’s personality and beauty.
After composition, the next step is checking the technical quality of the file — something essential for professional photo printing.
Printing is very different from viewing a photo on a screen. A picture that looks perfectly fine on your phone or computer can sometimes fall apart when enlarged for print. If the image was taken with a phone or a small camera, it’s important to make sure the resolution will still look crisp once the photo is printed at a larger size.
So I zoom in.
And this is where one of the most important checks happens: the eyes.
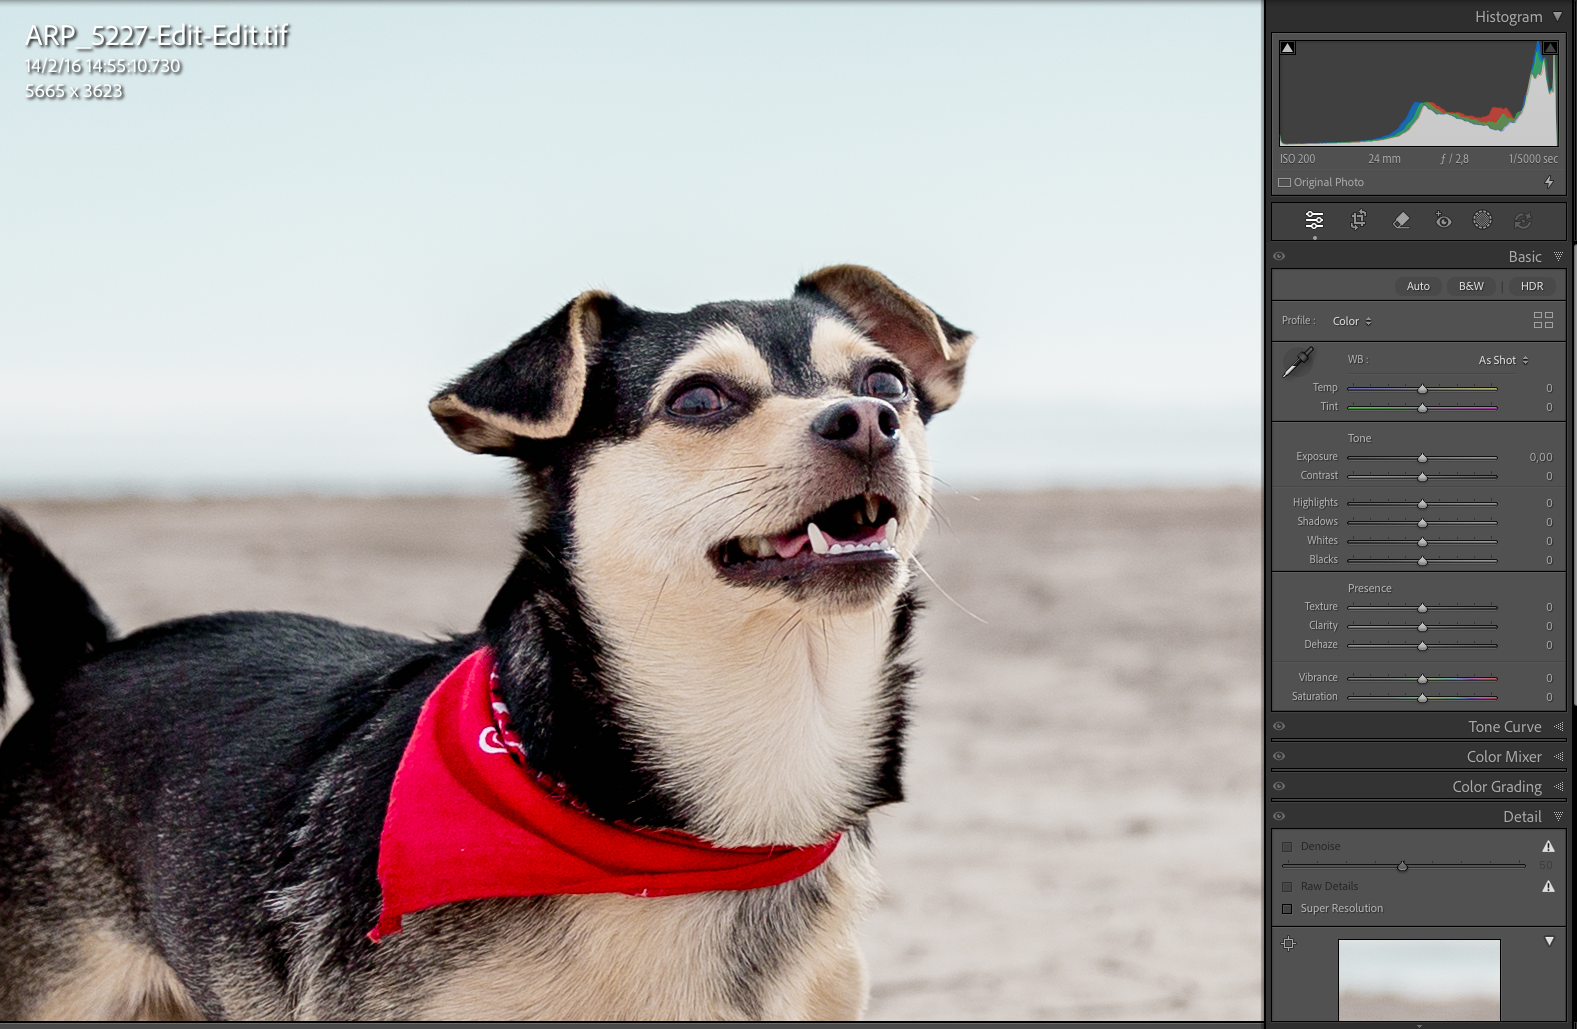
Riff's portrait open in Lightroom—checking sharpness in the eyes.
When photographing animals, the eyes are everything. They’re the emotional connection in the portrait. As I zoom into some of the photos, I notice that although they looked good on screen, the eyes are slightly soft or not perfectly in focus.
I try adjusting the sharpness in Lightroom, but if the focus isn’t truly there, no amount of editing will fix it completely. And for a print — especially one that will hang on the wall as a pet portrait canvas print — I don’t want to risk choosing an image where the eyes aren’t perfectly sharp.
So those images get eliminated.
Because when it comes to pet portraits, sharp eyes are non-negotiable.
Matching the Photo to the Product
Now that I’ve narrowed the selection down to my top four images, the next question is: which photo works best for which product?
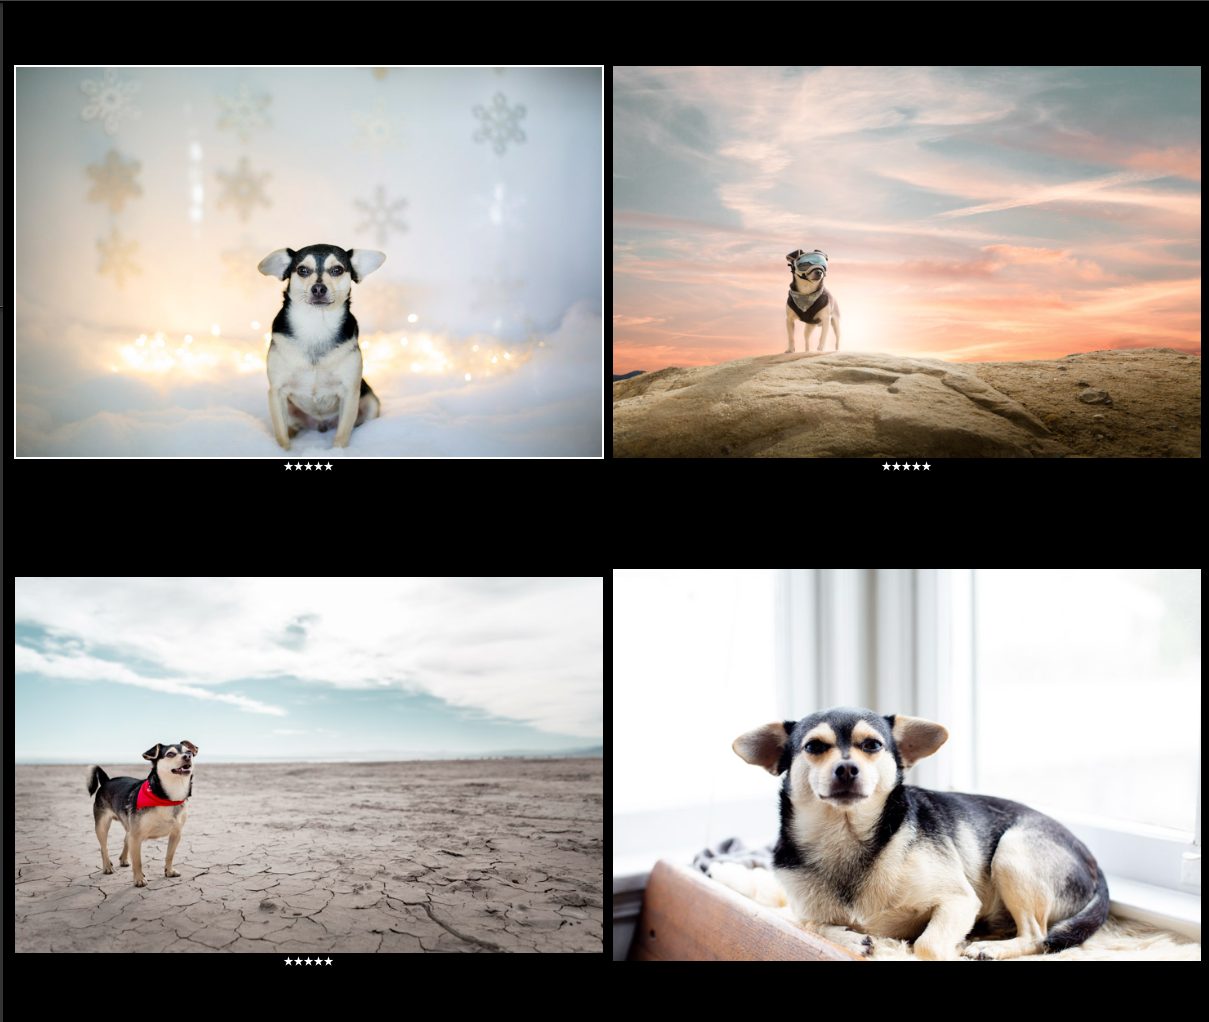
Narrowing down the final image — each portrait evaluated for composition, mood, and how well it would translate into a canvas print or photo blanket.
This step is essential because the same photo doesn’t necessarily translate well into every format, especially when creating a high-quality pet portrait print.
A canvas print, for example, is something that will likely hang on a wall. It becomes part of the space, almost like a piece of art. For that reason, the image needs to have presence and a bit of drama. It should stand out visually and feel strong enough to hold attention when you walk into a room — which is key when designing a canvas print for pet portraits.
Because of that, I’ve decided not to choose one of the winter photos I took of Riff. Even though I love them, the snowy setting feels very seasonal. For a canvas print, I prefer something more timeless — an image that will still feel relevant and beautiful years from now.
The blanket, on the other hand, gives me a little more flexibility.
Since the photo will be spread across a large surface — like a sofa or a bed — I’m looking for an image that translates well when enlarged and still feels visually balanced. The goal is for it to look like a beautiful, oversized photograph rather than a stretched or awkward crop — something closer to a large format photo print but on fabric.
In other words, I’m imagining the final product before I even place the order.
Because when you choose the right image for the right format, the finished print feels intentional — not just decorative.
Considering Where the Print Will Live
Another factor I always think about before choosing the final image is where the canvas will actually be displayed.
A print doesn’t exist in isolation. It becomes part of the room, so the environment and the colors of the photograph matter a lot — especially when creating a printed pet portrait that will live in a real home.
For example, if the space where the canvas will hang has a more rustic style — wood textures, warmer lighting, earthy tones — I might choose an image with warmer colors so it blends naturally with the atmosphere. On the other hand, sometimes the goal is the opposite: choosing a photograph with stronger contrast or cooler tones so the canvas pops and becomes a visual focal point in the room.
Another question I ask myself is whether the canvas will hang next to other pictures.
If that’s the case, I think about the role I want this portrait to play. Do I want it to stand out as the accent piece? Or do I want it to integrate more softly with the other photos on the wall? The color palette and overall mood of the image will influence that decision.
The location in the house also matters.
If the canvas were going in a kitchen, for example, I might choose something more seasonal or playful. I actually have photographs of Riff surrounded by harvest elements like pumpkins, which could work nicely in that type of space. But I probably wouldn’t hang a beach portrait in the kitchen — for me, the image should feel connected to the environment where it lives.
Ultimately, the goal is to choose a photo that feels natural in the space and contributes to the atmosphere of the room. When the image and the environment work together, the result feels warmer, more intentional, and much more personal.
Preparing the Photo for Print
Now that I’ve chosen the final image, the next step is to make sure that what I’m seeing on the screen will translate beautifully into the printed product.
Preparing a file for professional photo printing is very different from editing for screen.
For this part, I do my retouching in Lightroom, mainly because it allows me to work quickly and precisely. I’m not doing heavy editing here. The goal is to refine the image so it looks clean, balanced, and strong enough for print — especially if you want a high-quality pet portrait print.
I like to work step by step.
I start with the basics: adjusting the temperature, exposure, contrast, highlights, and shadows. Sometimes I also tweak the black point to give the image a bit more depth. At this stage, I’m looking for a balanced file with good tonal range — something that feels polished without losing the natural character of the portrait.
Then I move into the color work.
I check the hue and overall color balance to make sure everything feels coherent and pleasing. Since the final image will be printed, I pay close attention to subtle color shifts that may look fine on screen but could become more noticeable in physical form. While I’m at it, I also make small color corrections in areas that need a bit more refinement.
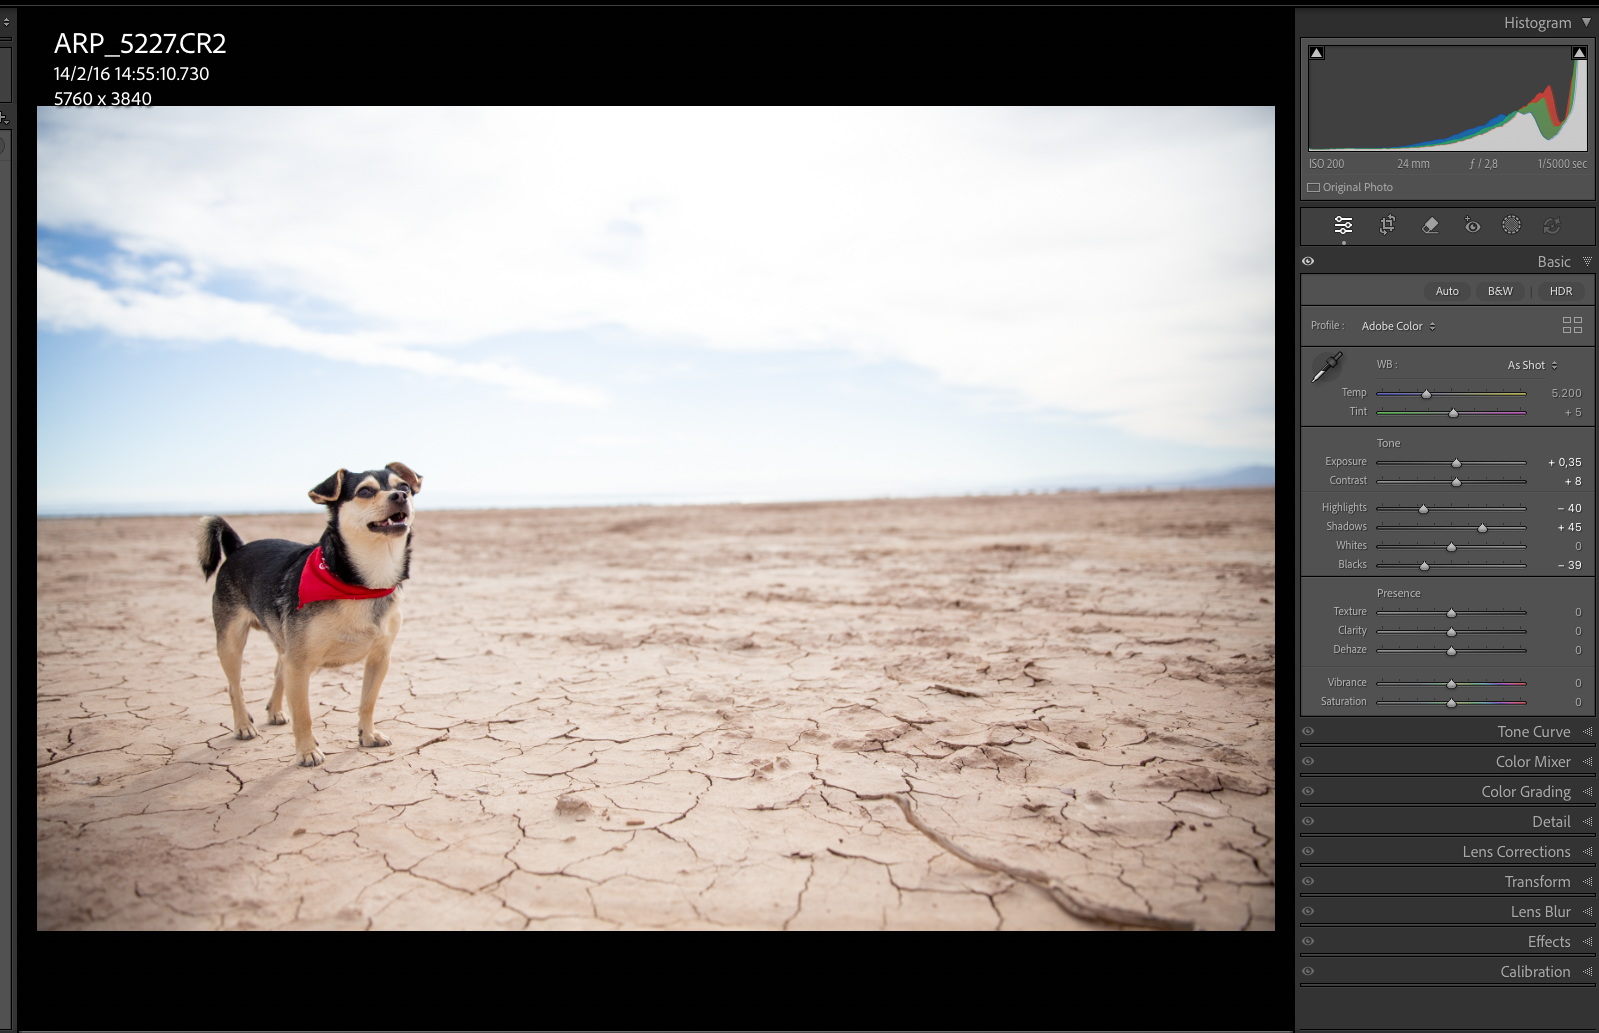
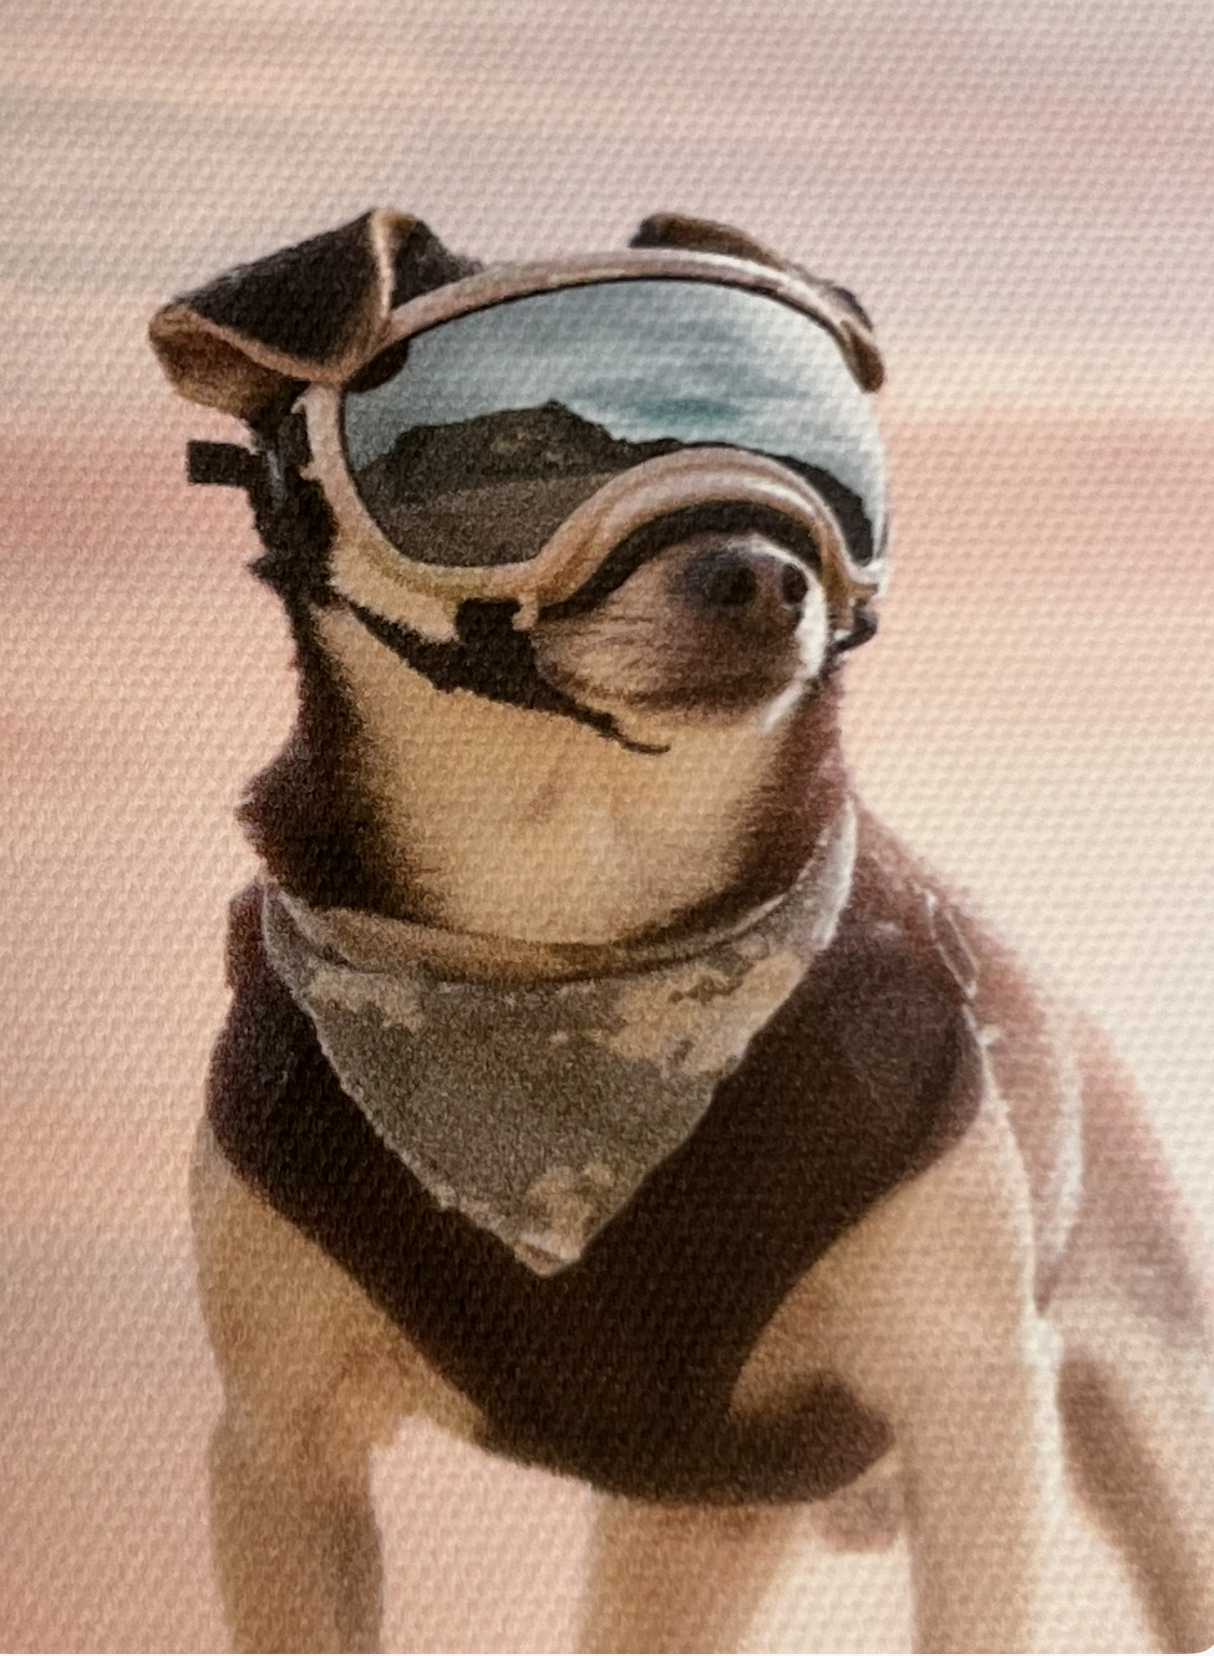
The desert portrait in Lightroom's develop module—tone adjustments dialed in to bring out depth in the cracked earth and keep Riff's colors balanced and print-ready.
After that, I zoom into the image again to double-check the eyes.
Even though I’ve already reviewed the file during the selection phase, I always do one final sharpness check before exporting anything for print. In pet photography, the eyes carry the connection and expression, so I want to be absolutely certain they’re in focus.
Next, I move to the detail panel.
If the image was taken at a high ISO, I make sure the noise is under control. I don’t mind a bit of grain — in fact, I sometimes like it, because it can add texture and atmosphere. But there’s a difference between subtle grain and noise that becomes distracting in print — especially in large format photo prints. Something that looks acceptable on a screen can feel overdone once enlarged, so I’m careful not to push it too far.
Then I apply a few technical corrections:
Remove chromatic aberration
Enable lens profile corrections
Use transform tools if needed
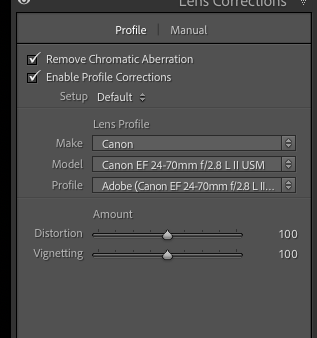
Applying lens corrections in Lightroom — removing chromatic aberration and enabling the Canon lens profile to ensure the image is technically clean before sending to print.
In this case, I noticed the horizon line wasn’t perfectly parallel to the floor, so I fixed that as well. Small alignment issues can feel minor on screen, but once printed, they tend to stand out more.
Finally, I add a bit of vignetting to bring more focus to the subject and create a slightly more dramatic feel. I also make a subtle adjustment to the sky color. Because I come from an advertising background, I naturally gravitate toward a certain visual style, and I often like to push the sky slightly toward the green side for a more refined, stylized look.
At this point, the image is no longer just a good photo on a screen. It’s becoming a file that is intentionally prepared to perform well in print.
The Three Essentials for a Print-Ready Photo
If I had to summarize what really matters when preparing a photo for printing, it comes down to three things.
First, focus — especially on the subject. In pet portraits, the eyes are the most important element. If the eyes aren’t sharp, the image will never feel fully alive, no matter how beautiful the scene or lighting might be.
Second, color balance. The colors should look natural, harmonious, and pleasant to the eye. Small color shifts that seem insignificant on screen can become more noticeable once the photo is printed, so it’s important to make sure everything feels balanced before exporting the file.
And finally, composition. A strong composition is what transforms a simple photograph into something that works as a piece of visual storytelling.
When these three elements come together — sharp focus, balanced colors, and strong composition — the chances of getting a high-quality pet portrait print increase dramatically.
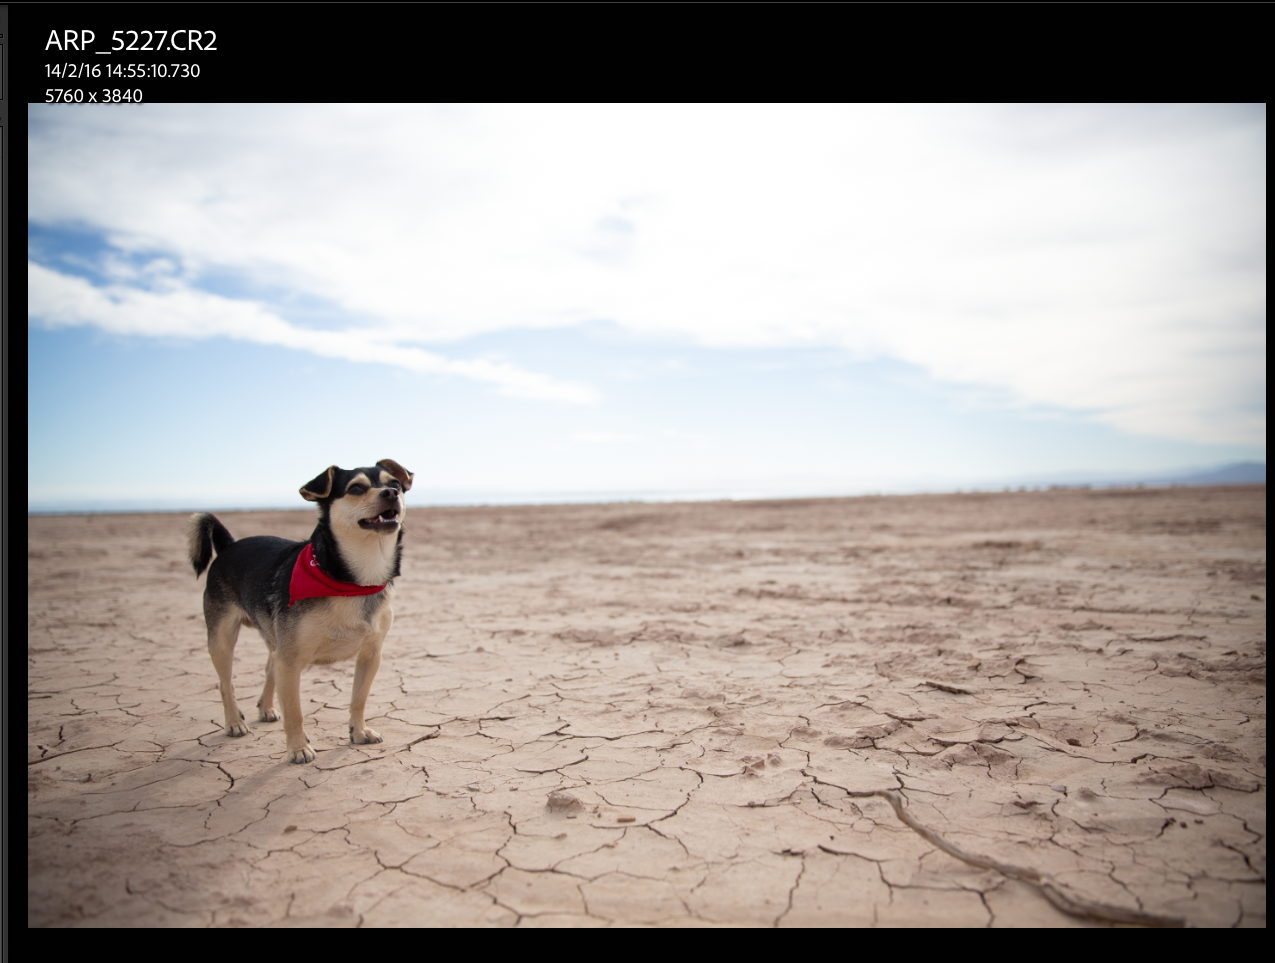
The original RAW file before any editing — flat tones, muted sky, and less contrast. A good starting point, but not yet ready for print.
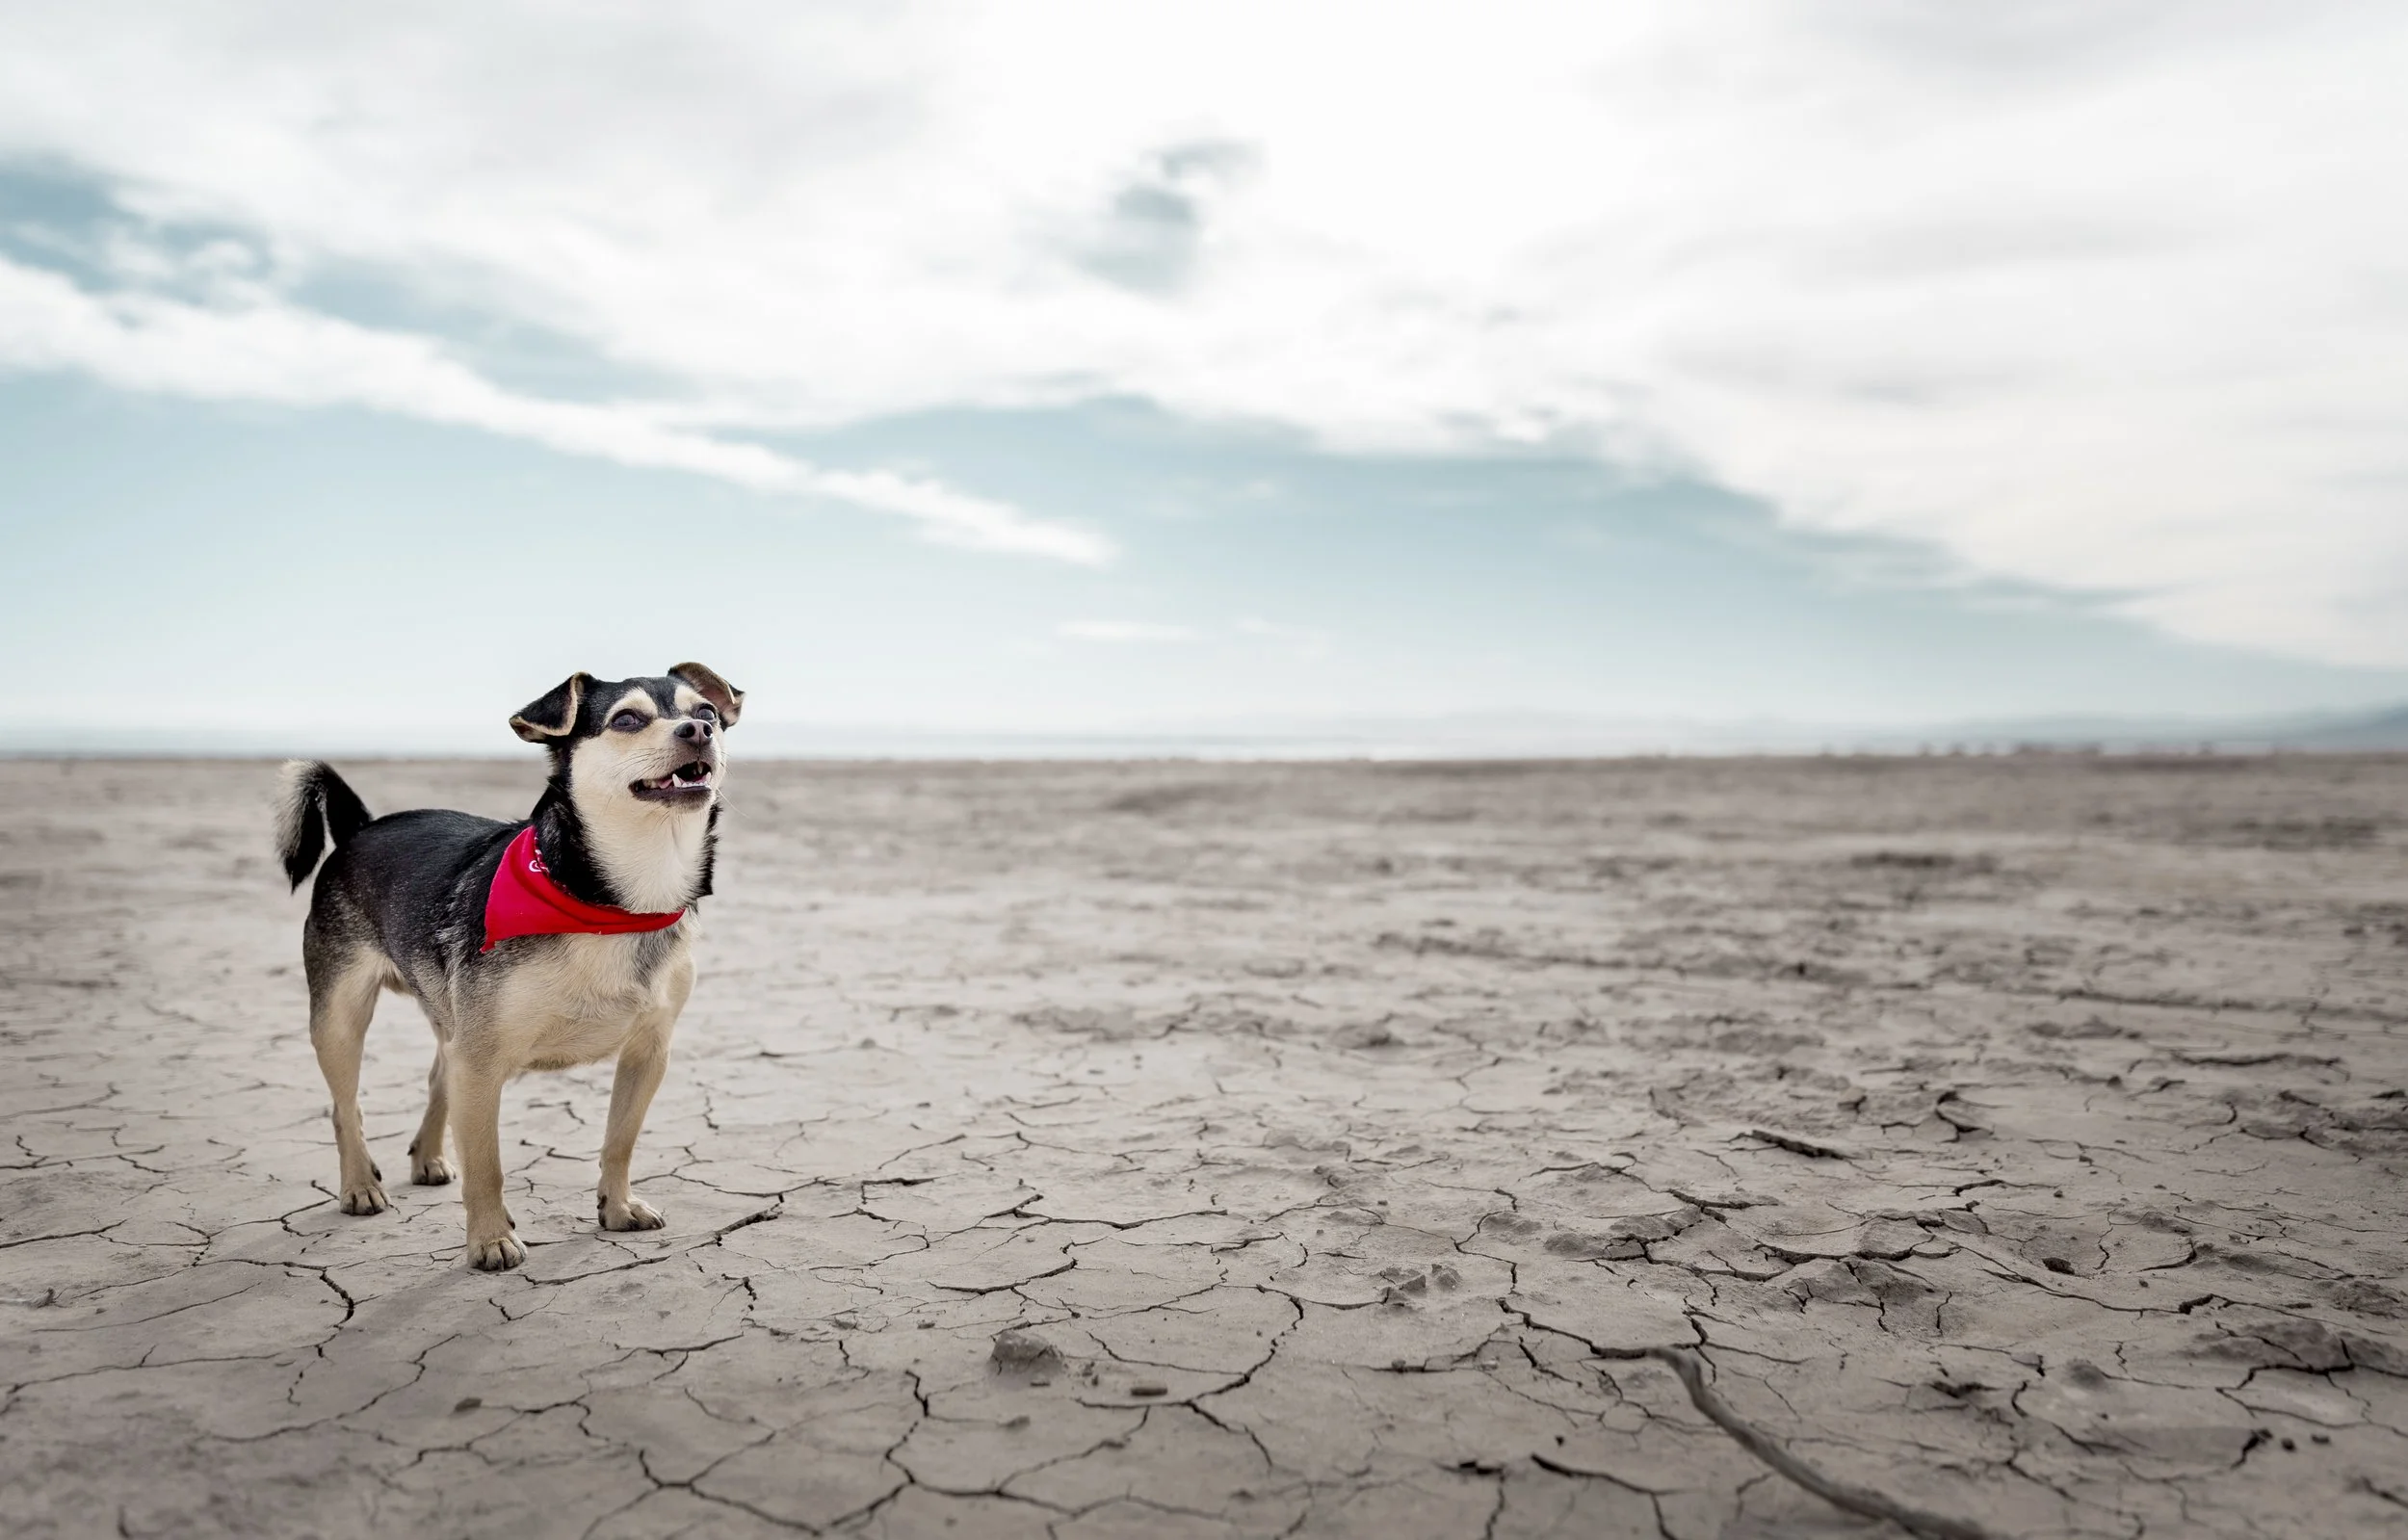
The final retouched portrait — deeper blacks, a more dramatic sky, and balanced colors that translate exactly as intended onto the finished canvas print.
Exporting the File for Print
With the retouching complete, the next step is exporting the image for print.
For this project, I’m exporting the photo at its full size, without cropping it beforehand. I prefer to do the final crop directly on the product page when placing the order, because that allows me to see exactly how the image fits within the format of the canvas or the blanket.
So the process is very straightforward.
In Lightroom, I simply right-click the image and select Export. When it comes to export settings, my main rule is to keep the maximum resolution possible. Printing requires as much detail as the file can provide, especially if the product will be displayed at a larger size or used for large format photo prints.
I’ll use Adobe RGB 1998 as color space.
By exporting the image at full resolution, I make sure the print service has the maximum amount of detail and information available, which helps ensure the final product looks crisp and sharp.
Once the file is exported, it’s ready for the next step: uploading the image and configuring the product on the website.
Choosing the Canvas Size and Format
Now it’s time to start with the canvas print.
After uploading the image to the website, the next step is choosing the format and size of the canvas. This is actually one of the parts I enjoy the most, because you can start visualizing how the final piece will look — especially when creating a canvas print for pet portraits.

Uploading Riff's portrait directly to CANVASDISCOUNT — the file transfer in progress before moving on to choose the canvas size and framing.
The interface is very intuitive. As I experiment with different formats, I can zoom in and out, adjust the framing, and instantly see how the image will sit within the canvas. At the same time, the price updates as I change the size, which makes it easy to compare different options.
To make a more realistic decision, I also keep a measuring tape next to me while I’m doing this. It may sound simple, but it helps a lot. Seeing a size on the screen is one thing, but measuring it in the actual space where the canvas will hang gives a much better sense of scale.
So I’m comparing two things at the same time: how the image looks on the screen, and how the physical size will feel in the room where I plan to place it.
Based on that combination — the visual framing and the real-world measurements — I’ll decide which canvas size works best for this portrait.
Placing the Order
Once I’ve selected the products and finalized the sizes, the next step is simply adding them to the cart.
The ordering flow is very straightforward. After reviewing the canvas and the blanket in the preview, I add them to the cart and proceed to checkout. The process is smooth and intuitive, which makes it easy to move from product configuration to completing the purchase — especially when ordering custom pet photo products.
One thing I appreciate is the variety of payment options available, which adds flexibility depending on how you prefer to pay.
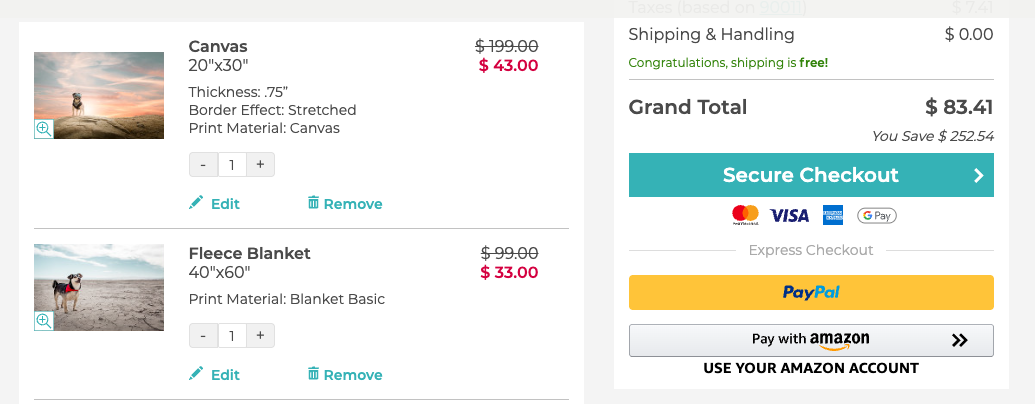
Final order summary — a 20"x30" canvas print and a 40"x60" fleece blanket of Riff's portraits, with $252.54 in savings and free shipping at checkout.
With everything confirmed, it’s time to place the order.
Now the only thing left to do is wait for the products to arrive. Once they do, I’ll take a closer look at the final prints — examining the materials, print quality, color accuracy, and how well the finished products match the image I prepared for print.
One week later
Unboxing & First Impressions
The moment the packages arrived, I was genuinely excited.
They came in two separate deliveries: the blanket in a protective bag and the canvas carefully wrapped in reinforced cardboard. Right away, the packaging felt secure — which is always the first good sign when you’re dealing with printed products, especially when ordering custom pet photo products online.
But what really stood out was the moment I opened them.
I have to say — I was genuinely impressed.
Blanket Review: Texture, Detail & Unexpected Quality
Let’s start with the blanket.
This was the product I was most curious about, and it completely surpassed my expectations.
For the price point, I honestly expected something thinner or more basic. Instead, what I got was a thick, high-quality blanket, with excellent stitching — and even more impressive, the stitching actually matches the tones of the image, which shows attention to detail.
Visually, the print is beautiful.
There’s a real sense of depth, especially in the fur. It almost feels like you could reach out and touch it. The level of detail translates surprisingly well onto fabric, which isn’t always easy to achieve — something that often varies when creating custom pet blankets from photos.
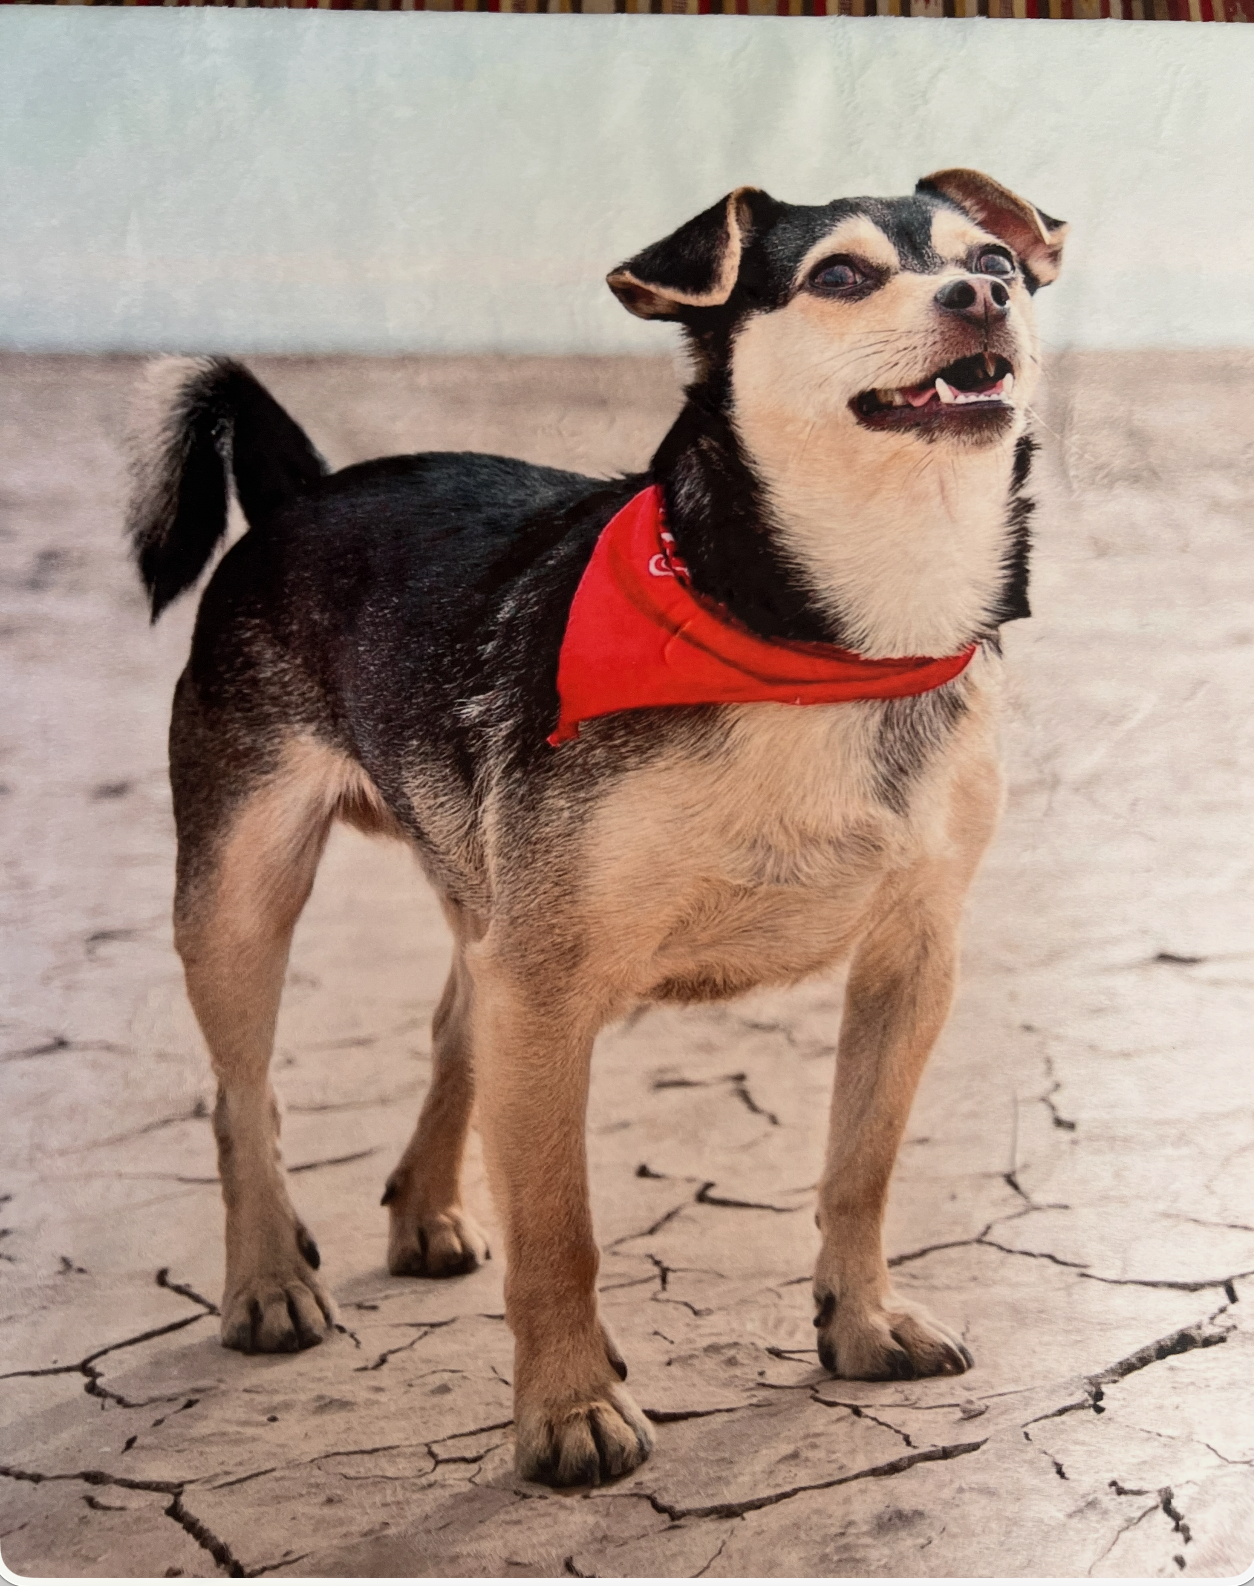

But beyond how it looks, it delivers on what I wanted emotionally: something warm, personal, and cozy — something that feels like Riff is still there with me.
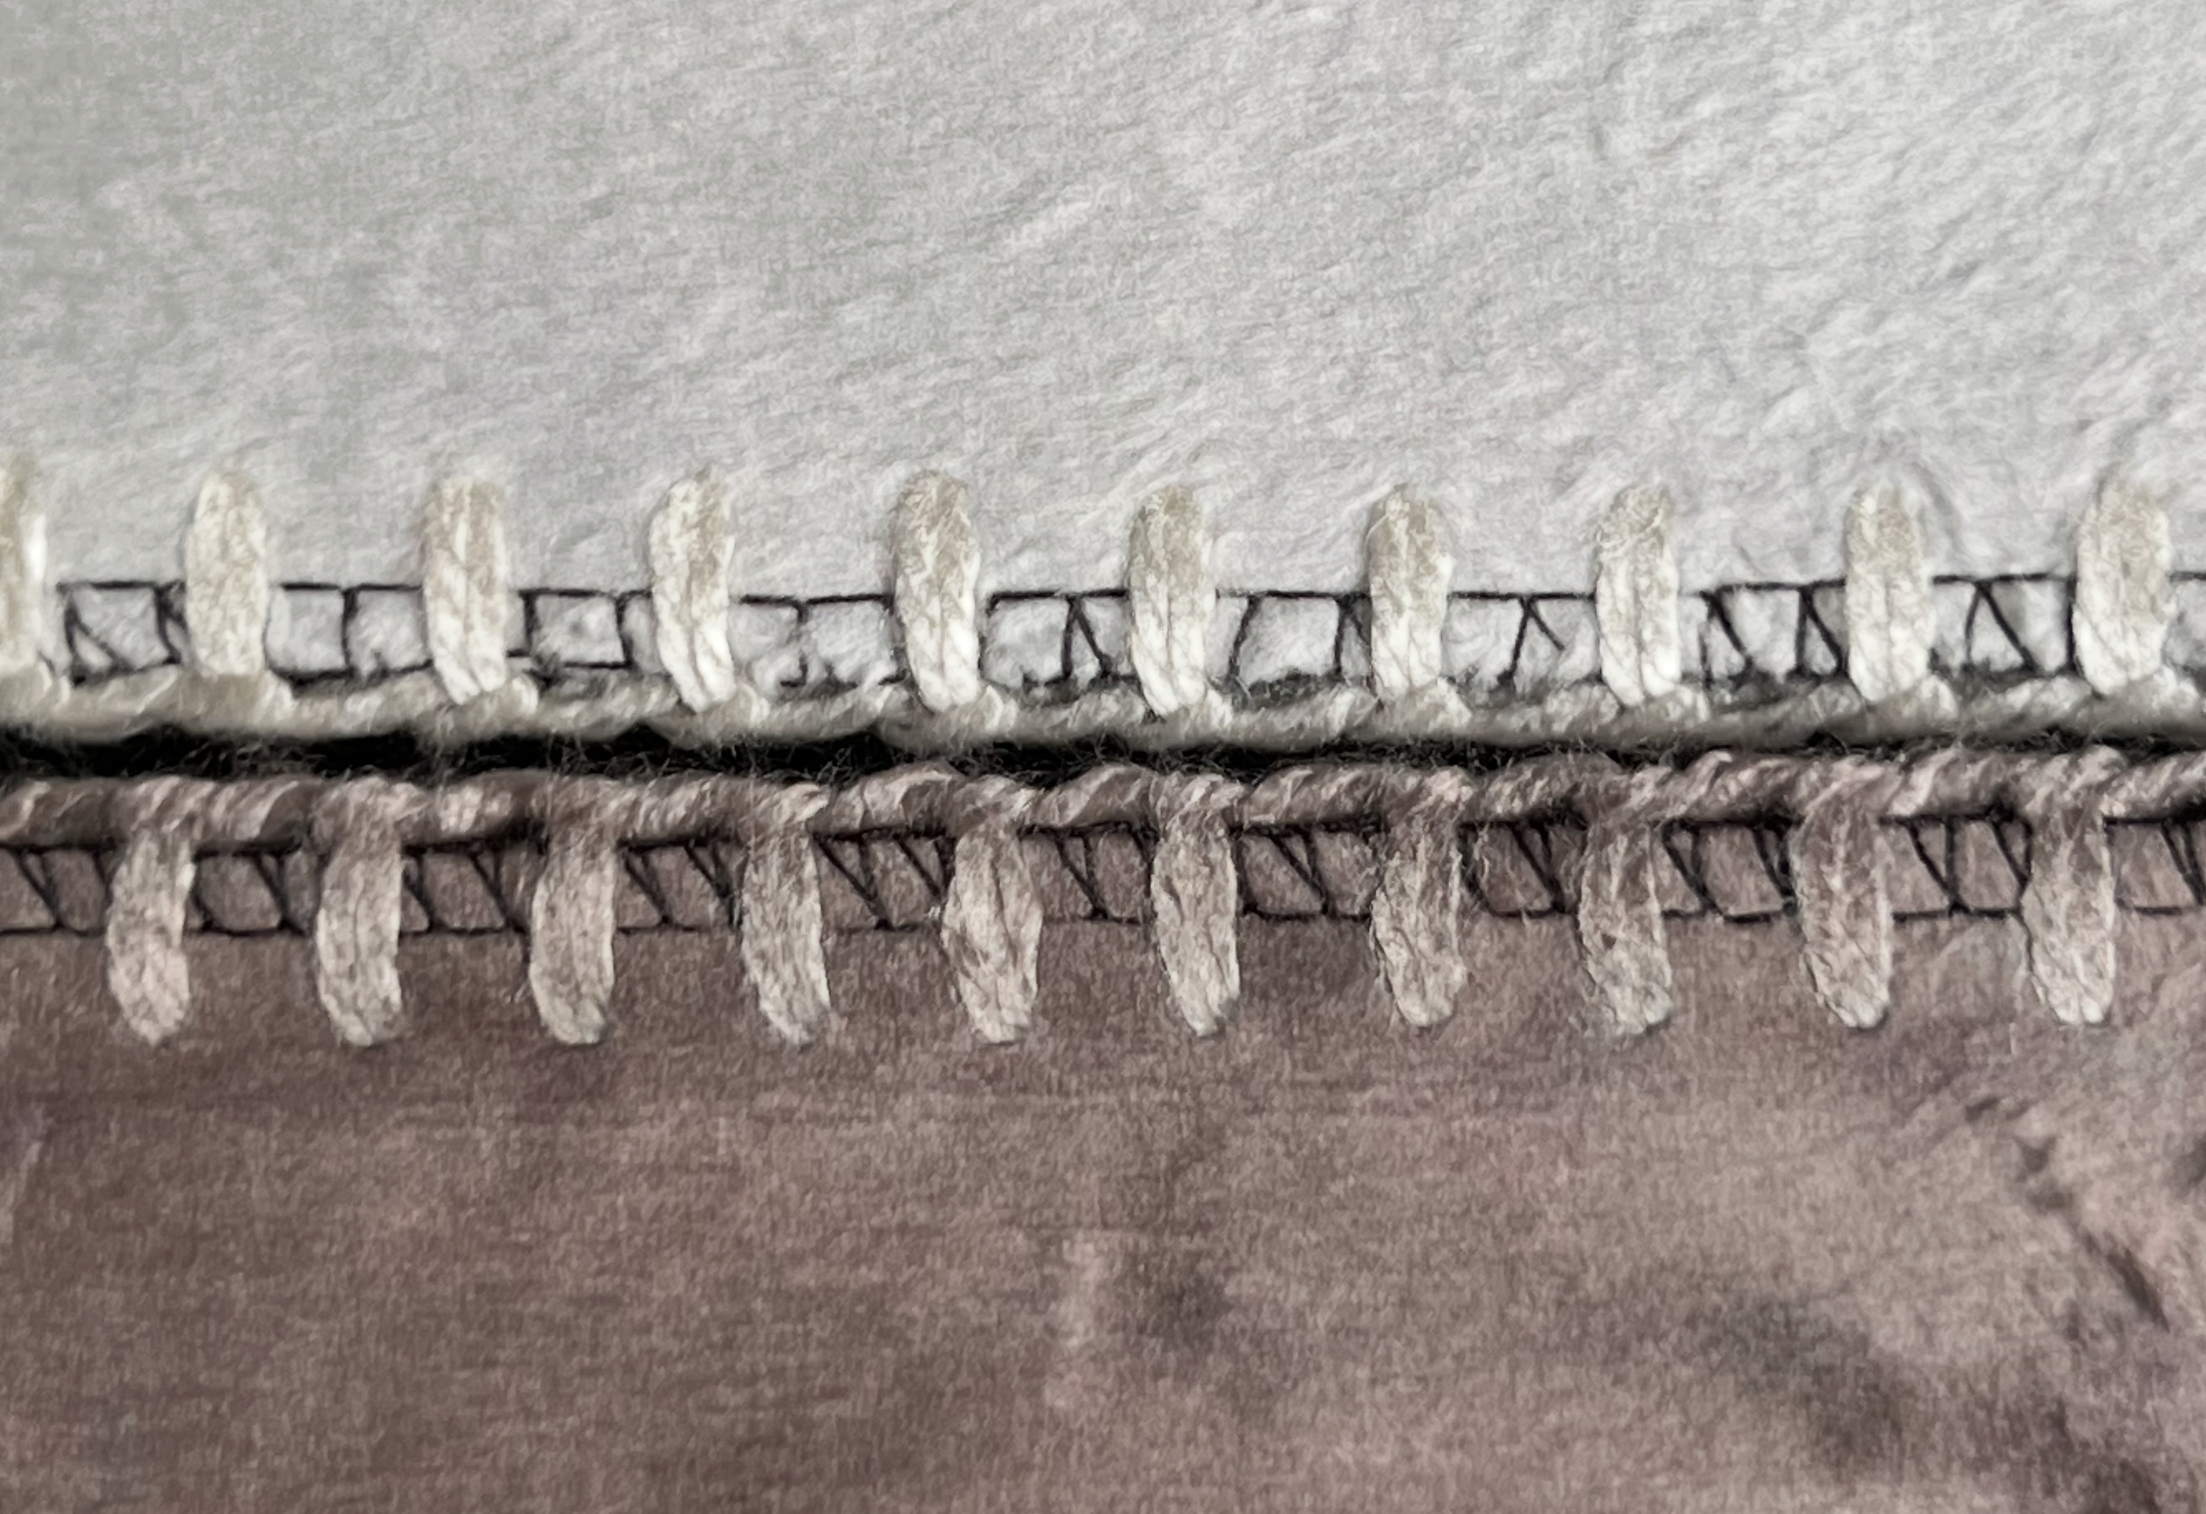
A detail worth noticing — the edge stitching shifts tone to match the colors of the printed image on each side of the blanket.
Color Accuracy: Screen vs Reality
When it comes to color accuracy, the result matched my expectations.
That said, it’s important to mention something: what you see on your screen will always vary slightly depending on the device. Not everyone works with calibrated monitors, and even between my MacBook and my Dell screen, I can see subtle differences.
But despite that, the final product reflects exactly what I envisioned.
The colors are not unexpectedly cooler, warmer, or darker. They feel consistent, balanced, and true to the edited file — which is essential when working with professional pet portrait printing.
Canvas Review: Build Quality & Presence
Now, onto the canvas.
The first thing you notice is the texture. It has that classic canvas finish that gives the image a more artistic feel, rather than just looking like a printed photo — which is exactly what you want in a canvas print for pet portraits.
The detail is excellent, especially in the eyes and the fur — which, for me, is always the benchmark of a good pet portrait print, and even more so in a professional pet portrait canvas print.
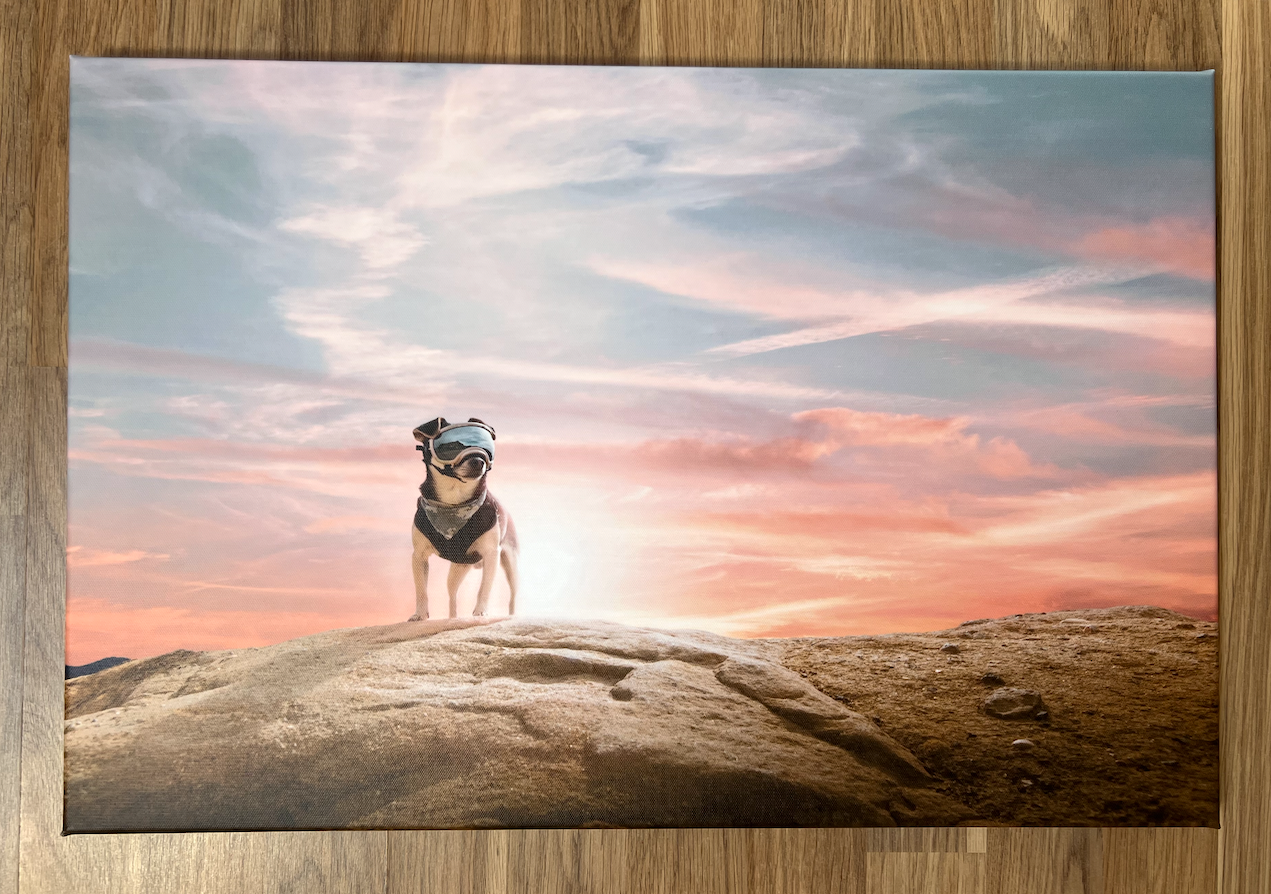
The finished canvas print — Riff's sunset portrait printed stretched canvas, with rich colors, sharp detail, and the kind of presence that makes it feel like a true piece of art.
The build quality is also very solid. If you look at the back, you can see the wooden frame and how everything is assembled. And in my experience, when the parts you don’t see are well done, it usually means the overall product has been made with care.

The back of the canvas tells its own story — a solid wooden frame, neatly stapled edges, and a QR code. When the parts you don't see are this well made, it's a good sign for the whole product.
Zooming into the canvas surface. The canvas texture adds an artistic quality without losing the fine detail of the portrait.
There was one small detail — a tiny area in one corner where the ink seems slightly missing, possibly due to friction. It’s not perfect, but it’s minor, and realistically, it doesn’t take away from the overall impact of the piece. And if needed, customer support is there to help.
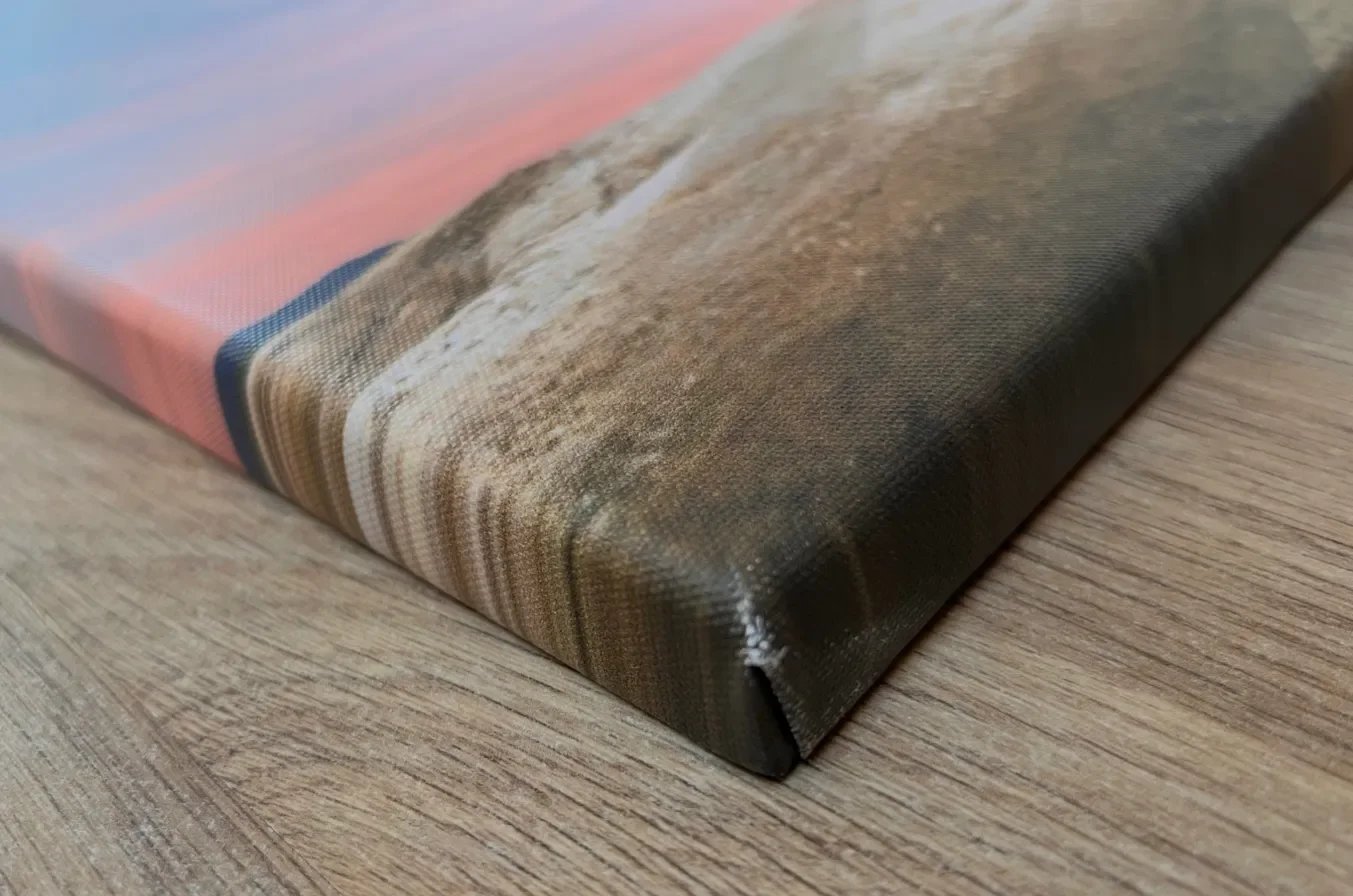
The wrapped edge detail — the image extends cleanly across the sides with solid stretching. A tiny scuff is visible at one corner, but it’s not visible when it’s on the wall.
Overall, the canvas truly feels like what I wanted it to be: a piece of art, not just a photo.
A Note on Creative Alternatives: AI Pet Portraits
While working on this project, it also made me reflect on another growing option for pet owners: custom pet portraits from photos using AI tools.
These tools can stylize your pet’s image — turning it into illustrations, paintings, or themed artworks. They can be fun and offer a different kind of personalization, often seen as AI pet portraits or personalized pet artwork.
That said, I see this as a complementary option, not a replacement.
AI-generated portraits can be creative and playful, but they don’t replace the emotional depth, intentional composition, and technical precision of a professionally captured and prepared photograph. If anything, they can coexist — one as artistic reinterpretation, the other as a true, tangible memory.
Final Decision: Choosing the Right Format for Real Life
After seeing both products in real life, the difference in how they are experienced becomes very clear.
The canvas works best as a focal point. It’s ideal for a space where you want the image to be seen from a distance — like a living room wall — where it can anchor the room and create presence as a wall art pet portrait.
The blanket, on the other hand, is more intimate. It lives closer to you — on a sofa or a bed — where the experience is not just visual, but also tactile.
Choosing between them isn’t about which one is better. It’s about how you want to experience the image — and how you want to live with your printed pet portrait:
From afar, as art
Or up close, as comfort
Final Verdict
Would I recommend CANVASDISCOUNT?
Yes — 100%.
From the ease of the process, to the pricing, to the final result — everything felt smooth and reliable. But most importantly, the quality truly stands out.
And that’s what matters most.
If you love photography and want to print pet portraits professionally and turn your images into something tangible — something you can live with, not just store on a screen — this is a great option.
And one final thought: We often think about printing photos of people we love. But our pets are part of that story too. And they deserve to be remembered just as beautifully.
We spend so much time creating images for others. If this project reminded you of anything, let it be this: your own memories deserve the same care. Pick the photo. Order the print. Don't wait.