
In another post, I talked about how to build a strong brand. One of the tools I use the most is Photoshop.
Today, I’m going to share with you how to create eye-catching texts and designs in minutes.
So, let’s get started!

Highlighting text in Photoshop is not a tough task. You can do it with a few simple steps and it will help you create many great designs for your brand.
If you want to make your images more eye-catching, you have to add some text and highlight it. Here, Photoshop is a great tool for that, whether you are a beginner or an expert.
Now, we’re going to discuss how to highlight text in Photoshop and how to make it stand out with the following step-by-step guidelines. So, let’s get started!
Step#1. Start a New Project in Photoshop:
If you have a picture that you want to use as the background, you can bring it into Photoshop by dragging and dropping it or clicking the Open button. See the below images:


On the other hand, if you don't have a picture, you can make a new document by pressing Cmd+N (For Mac Users) or Ctrl+N (For Windows Users). Go to the "File" tab and choose the “New” option from the drop-down menu.
Then a pop-up named New Document will appear. Here, set up your “Preset details” based on your needs and then click on the “Create” button.
Then you will see a blank document and you need to drag and drop your preferred image file there.
After opening your image file in the Photoshop workspace, unlock your background layer by pressing the right-click on it.


Step#2. Write the Words You Want:
On the Layer panel, make a new layer. Go to the toolbar of your left-side Photoshop interface and choose the “Horizontal Type Tool” from the text tool. If the word is already written on the image, you may need to cut out the text in a separate layer to highlight it.
After that, click on the text icon and write your preferred words/texts there. Then choose your desired font and style for the texts. You can make the words look bolder in Photoshop CC if you want.


Step#3. Make a Copy of the Text:
In this stage, you have to make a copy of the text on a new layer by pressing Ctrl + J together.

Then, choose the color of the text using the “Color Picker” box.

Step#4. Make an Underline:
Select the bottom part of the words. Then go to the “Window” tab and choose the “Character” option from the drop-down menu.

Then pick the "Underline Text" option. This will make an underline that fits perfectly with the words.

Step#5. Turn the Words/texts into a Shape:
The next thing you need to do to highlight texts in Photoshop is to turn the words into a shape. Right-click on the layer name and pick the "Convert to Shape" option from the list. Be cautious about this task because you won't be able to change the words after this action. Look at the below images to understand things quickly:

Step#6. Using the Path Selection Tool:
In this step, go to the toolbar on your left-side Photoshop interface. Then pick the Path Selection Tool (A).

Now, use the “Path Selection Tool” to select all the words (except the underline) and delete them one by one in Photoshop CC. This way you should only see the underlines on your screen.


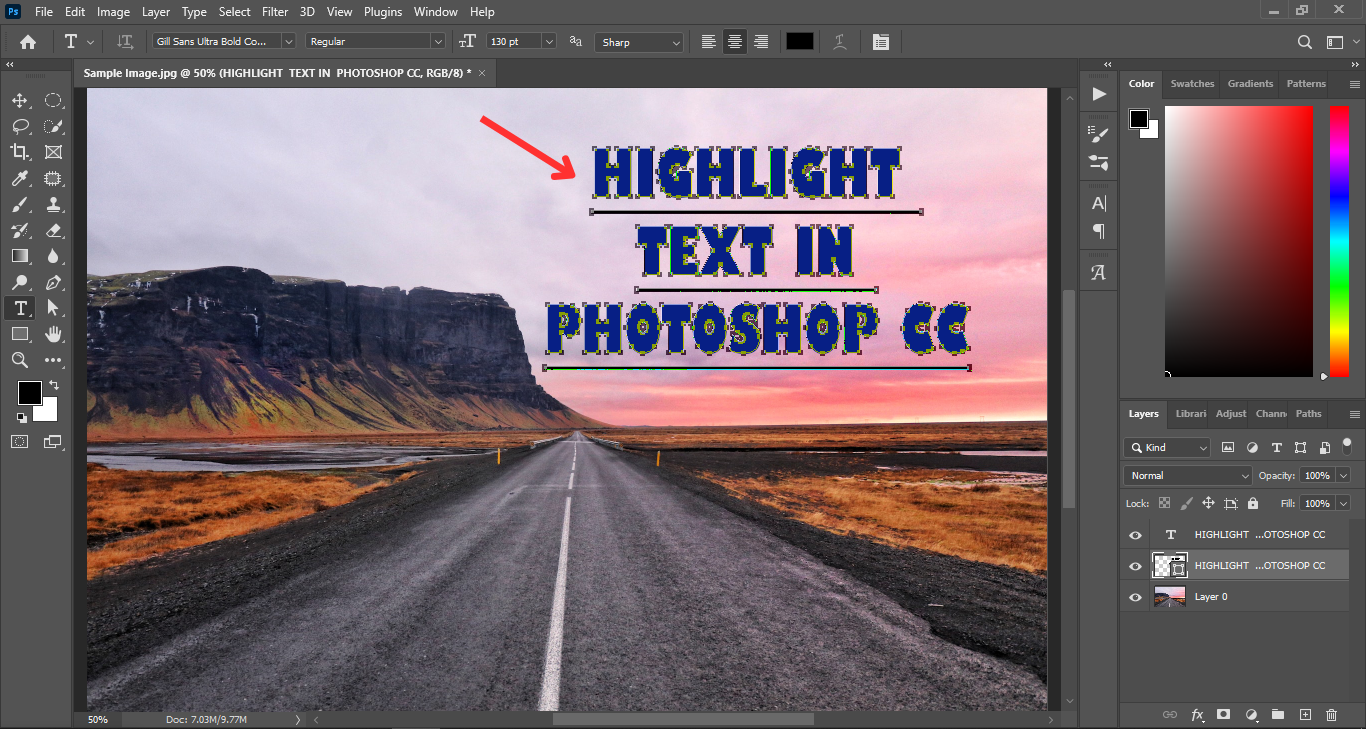
Step#7. Move the Points Upward:
Now, select the “Direct Selection Tool” from the selection tool’s list in order to move your text points slightly upward.

To make the underlines look like rectangles, use the “up arrow key” on your keyboard. Then, move the points up until you get the size of the rectangle you want.

Now, click on the Color Fill box and choose your desired color based on your needs. Follow the same trick for modifying and highlighting each text in Photoshop CC.
You can look at a glance of the following images to understand how it works smoothly:
S-7.2, S-7.3, S-7.4


Step#8. Get the final output:
That's it! Congrats! Now you have learned how to highlight text in Photoshop CC by following this step-by-step method. See the final image below:

If you need any help with editing your picture, and you are too busy to do it yourself, then ask for our professional help. We are happy to help you.
Final Words About How to Highlight Text in Photoshop:
In a nutshell, you have learned about how to highlight text in Photoshop using this simple method. This technique can help you create stunning designs and texts for your project works. You can experiment with different colors, fonts, and shapes to make your words pop even more.
If you enjoyed this Photoshop highlight text tutorial, please share it with your friends and let us know your valuable words in the comment section below. We would love to see your creations and hear your feedback.
However, you can also check out our other latest tutorials on Photoshop and photography tips on our website. There you will find more professional tricks to unleash your creativity and make amazing things.
Thank you for reading and Happy creating with the Photoshop highlight effect!